| |
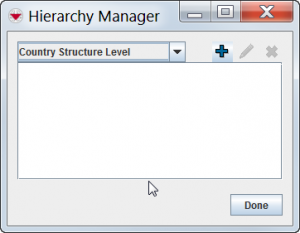
All different levels are handled by the Hierarchy Manager in the Customisation menu |
There are four different Auxiliary data that are using levels:
- Assistance classification
- Cause classification
- Country structure
- Needs classifications
| Type | Maximum number of levels |
|---|---|
| Assistance | 10 |
| Cause | 10 |
| Country structure | 7 |
| Needs | 10 |
Add levels
- In the Customisation menu → Hierarchy Manager.
- Select the type of level from the dropdown.
- Click the
 button.
 - Enter the name of the level.
- Click the Submit button.
- To add additional levels, repeat steps 3 - 5.
- When you have completed adding levels, click the Done button.
Hierarchy Manager
Hierarchy Editor
The Hierarchy Manager window displays the level that you added.
| |
It is not possible to add levels between existing levels. |
| |
If you add a Country structure level, you will need to update Data Entry Form templates which have Country Structure widget. |
Edit levels
- In the Customisation menu → Hierarchy Manager.
- In the Hierarchy Manager window, select the type of level that you would like to edit from the dropdown list.
- Select the level that you would like to change.
- Click the
 button.
 - In the Hierarchy Editor window, edit the level name as needed.
- Click the Submit button.
- To close the Hierarchy Manager window, click the Done button.
| |
If you change a Country Structure Level Name, you will need to update Data Entry Form templates which have Country Structure widget. |
Delete levels
Levels can only be deleted under two conditions:
- The level does not have any data associated with it.
- The level itself does not have any lower levels associated with it.
- In the Customisation menu → Hierarchy Manager.
- In the Hierarchy Manager window, select the type of level that you like to delete from the dropdown list.
- Select the level that you would like to delete.
- Click the
 button.
 - To delete the level, click the Yes button.
- Click the Done button.
| |
The |
The Verify Deletion window displays a confirmation message.
| |
If you delete a Country structure level, you will need to update Data Entry Form templates that have Country Structure widget. |
| |||||||||||||||||||||||

