Difference between revisions of "Enter Geospatial Data in the Data Entry Form"
| Line 35: | Line 35: | ||
| − | <p>From the Point and Polygon/Polyline List window, you can enter geospatial points in one of several ways: manually (see [[Manual Geospatial Data Entry]]), by drawing on the map (see [[Draw on the Map to Specify Geographic Coordinates]]), by importing data from | + | <p>From the Point and Polygon/Polyline List window, you can enter geospatial points in one of several ways: manually (see [[Manual Geospatial Data Entry]]), by drawing on the map (see [[Draw on the Map to Specify Geographic Coordinates]]), by importing data from Excel spreadsheet (see [[Import Geospatial Data from Excel]]), or from the shapefile (see [[Import Geospatial Data from Shapefile]]). |
<br /><br /> | <br /><br /> | ||
Revision as of 15:26, 30 May 2014
There are several options to enter geospatial data into IMSMANG:
- Manual Data Entry
- Drawing on the Map
- Importing from Excel spreadsheet
- Importing as a shapefile
To enter the geospatial data into IMSMANG, click on ![]() icon on the Data Entry Form Editor window.
icon on the Data Entry Form Editor window.
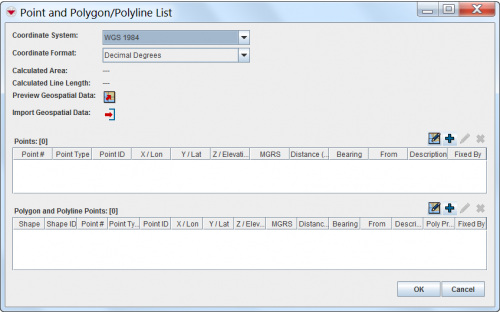
The interface to enter geospatial data manually or by drawing on the map consists of two tables: a Points table, and a Polygon and Polyline Points table.
From the Point and Polygon/Polyline List window, you can enter geospatial points in one of several ways: manually (see Manual Geospatial Data Entry), by drawing on the map (see Draw on the Map to Specify Geographic Coordinates), by importing data from Excel spreadsheet (see Import Geospatial Data from Excel), or from the shapefile (see Import Geospatial Data from Shapefile).
You have to specify the Coordinate System and Coordinate Format you would like to use.
After you have entered the points, IMSMA displays the calculated area size and line length of the geospatial data on each of the summary windows.
