Using the Tasking Tool in IMSMANG
Depending on local standard operating procedures (SOPs), the tasking tool can be used to manage activities for one land or several lands, or for monitoring a specific organisation that was tasked.
All the compiled information related to the specified task can be viewed and printed from the task manager or the Task Editor window.
| Windows Vista and Windows 7 users, this sign next to a step is a reminder for you that you must right-click executables and choose Run as administrator from the context menu. |
Viewing Tasks
| |
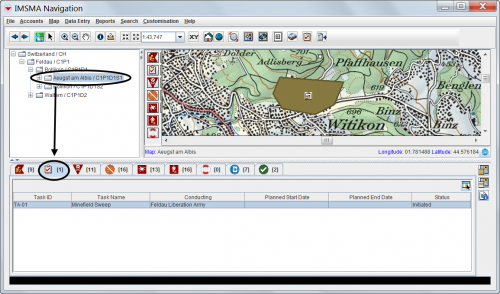
Tasks can be displayed in the items pane by selecting a specific country structure area. |
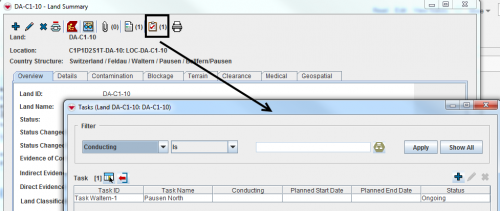
On an Item's Summary
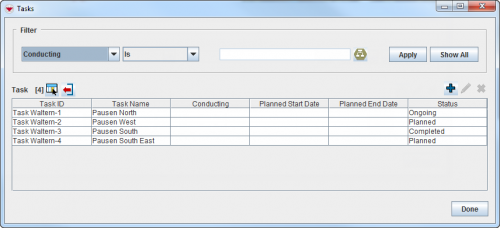
On the Tasks Window
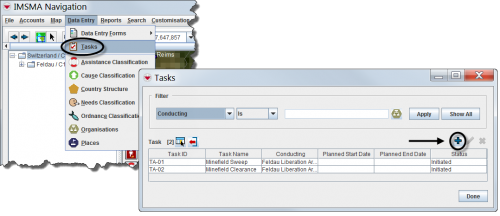
To access the Task window, select the Data Entry menu, and then select Tasks.
Tasks Window
Filtering the Tasks Displayed
By default, all tasks are listed in the table when the Tasks window is opened. You can limit the tasks displayed in the table by selecting specific filter attributes.
Filtering Tasks
To filter the tasks displayed in the Tasks window:
- From the Data Entry menu, select Tasks.
- The Tasks window displays.
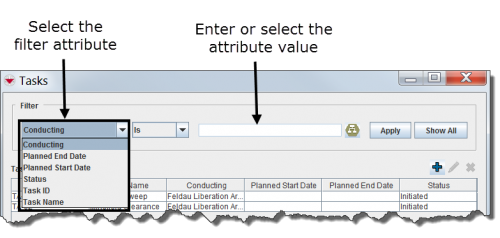
- Select the attribute on which you would like to apply the filter from the Filter drop-down list. Filter options for tasks include:
- Current Owner – returns tasks owned by the organisation you selected from the list.
- Current Status – returns tasks with the status value that you selected from the list.
- Task ID – returns tasks with a task ID that contains the specified value.
- Task Name – returns tasks with a task name that contains the specified value.
- Enter or select a value that the selected attribute must be either similar to or contain. Note that the filter is not case-sensitive.
- Click the Apply button.
- Tasks passing the filter are listed in the table.
Adding New Tasks
| |
Only lands, activities, education activities and QMs can have associated tasks. |
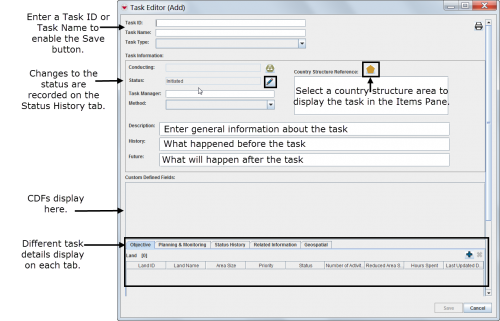
Completing General Information Details
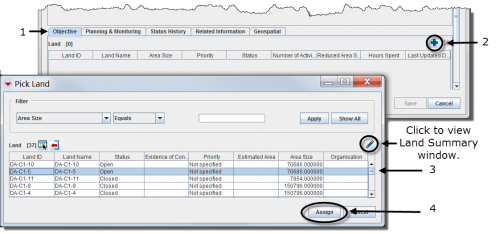
Associating Objectives
| |
The objective refers to a single or to several lands that have the same task. |
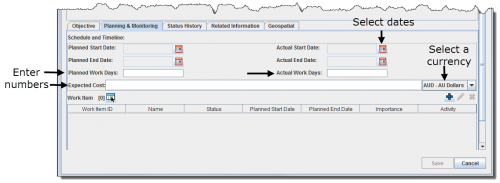
Associating Work Items
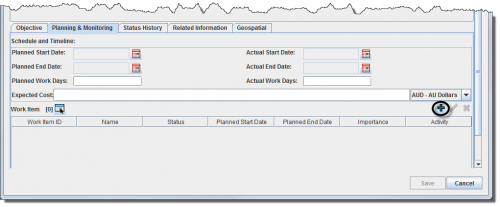
- Select the Planning & Monitoring tab in the Task Editor window.
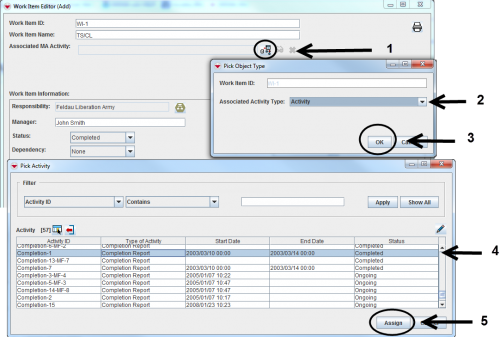
- Enter a work item ID or work item name to enable the OK button.
- Associate an MA activity data entry form.
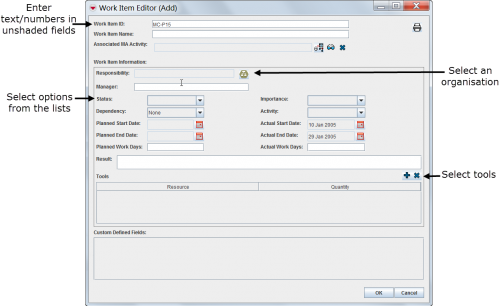
- Enter general information about the work item.
Viewing Task Status History
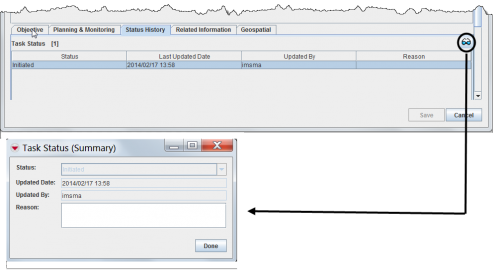
The Status History tab displays a list of status updates made to the task. Each time a user changes the status of a task in the Task Editor window, a new record is entered in Task Statuses table. The following information is displayed:
- The status selected at each status update.
- The date of each status update.
- The username of the person who initiated the status update.
- The reason (if provided) for the status update.
| |
You can click the |
Status History Tab
Adding Related Information
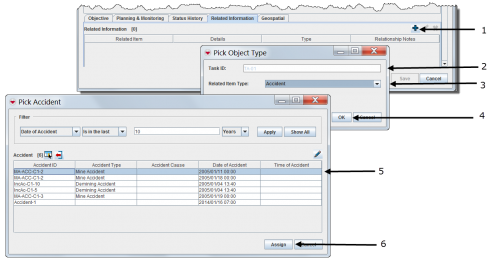
- Select the Related Information tab in the Task Editor window.
- Select auxiliary data, a data entry form item or a task.
Tasks allow you to manage work that is required as part of your mine action process. You can link tasks to standard IMSMA items or to specific areas on the map, assign task objectives and sub-tasks (called work items), and record other work-related information such as start and end dates, available resources, responsible personnel, and status changes.
Adding Geospatial Data
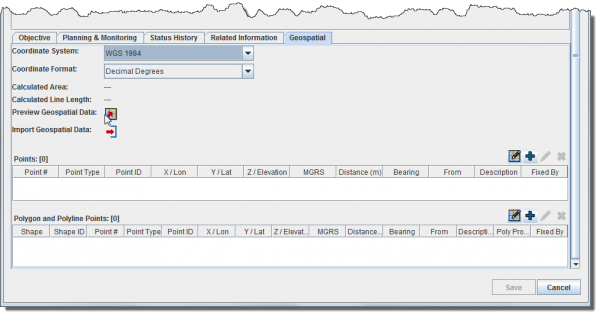
The geospatial data tab allows you to add, edit, delete, or import geospatial shapes (points, polygons, and polylines) associated with the task. As with other similar windows, you can:
- Add shapes either manually or by drawing on the map
- Select any coordinate reference system and format
- Incorporate bearing and distance measurements
For more information, refer to Geospatial Data.
Geospatial Data Tab
| |
You can disable and hide the geospatial data tab by changing the IMSMA system preferences. Refer to Setting System Preferences. |
Editing Tasks
To view and/or change task information:
- From the Tasks window, select the row associated with the task you would like to view or change.
- Click the
 button.
 - Change the information as needed. For more information about editing the various data entry fields, refer to Adding New Tasks.
- Do one of the following:
- To save the changes you have made to the task, click Save.
- To discard any changes you have made, click Cancel.
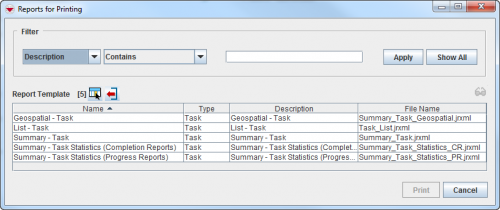
Printing a Task Summary
Removing a Task
| |
Not all tasks can be removed. You cannot remove tasks that contain Objectives or Work Items. However, you can remove tasks that are linked to Related Information. |
To remove a task:
- From the Tasks window, click the row associated with the task you would like to remove.
- Click the
 button.
 - The Verify Deletion window displays.
- Do one of the following:
- To delete the task, click the Yes button.
- The Task is removed.
- To cancel the delete operation, click the No button.
