Difference between revisions of "User List Window"
From IMSMA Wiki
| (3 intermediate revisions by the same user not shown) | |||
| Line 1: | Line 1: | ||
| + | [[Image:UserList.png|440px|center]] | ||
| + | |||
All user account changes are managed through the User List window. | All user account changes are managed through the User List window. | ||
| − | + | In the '''Accounts''' menu → '''Users''' opens the User List window which contains {{IMSMANG}} user IDs, names, and their status. | |
From the User List window you can: | From the User List window you can: | ||
| Line 11: | Line 13: | ||
{{note| Note that the [[File:FieldViewIcon.png|20px]] button is only available after you have selected a user from the list.}} | {{note| Note that the [[File:FieldViewIcon.png|20px]] button is only available after you have selected a user from the list.}} | ||
| − | + | ||
{{NavBox HowTo Users and Roles}} | {{NavBox HowTo Users and Roles}} | ||
| − | [[Category: | + | [[Category:NAA]] |
Latest revision as of 10:02, 15 June 2017
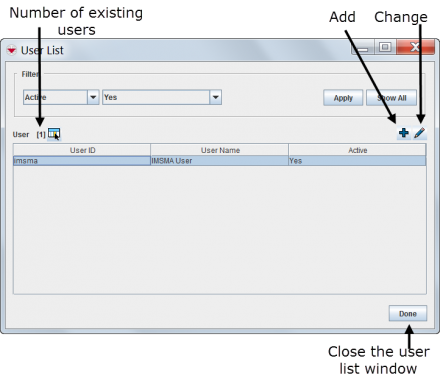
All user account changes are managed through the User List window.
In the Accounts menu → Users opens the User List window which contains IMSMANG user IDs, names, and their status.
From the User List window you can:
- Filter the users listed in the User List window.
- Select the columns that are displayed in the User List window. For more information, refer to Select Display Columns.
- Add a user. For more information, refer to Add a New User.
- Change information associated with a user. For more information, refer to View and/or Change a User.
| |
Note that the |
| ||||||||||
