Creating Ad Hoc Views in MINT: Difference between revisions
Jump to navigation
Jump to search
No edit summary |
No edit summary |
||
| Line 44: | Line 44: | ||
== Export data ==__NOEDITSECTION__ | == Export data ==__NOEDITSECTION__ | ||
[[File:MINT_adhoc_export_data.png|center]] | |||
{{NavBox Business Intelligence}} | {{NavBox Business Intelligence}} | ||
[[Category:VIE]] | [[Category:VIE]] | ||
Revision as of 12:34, 21 January 2015
| This page is under construction |
What is an Ad Hoc View?
The Ad Hoc Editor allows the ad hoc exploration of data - typically the data from a Domain. It is meant for users who would like to explore data, as opposed to running a pre-defined report that allows for only little interactivity.
Create an Ad Hoc View
To create an ad hoc view:
- In the top-level menu, choose Create → Ad Hoc View

- In the Select Data window, select the data the Ad Hoc View should be based on - this can be either a domain or a topic. In the Select Data window it is possible to switch between a list and a tree view by clicking on the respective icon in the top left corner. The list view provides a list of all available domains and topics in a flat structure (including those from the Public folder, if any), whereas the tree view presents them according to the repository folder structure. Select a domain or topic and click on Choose Data....
List view: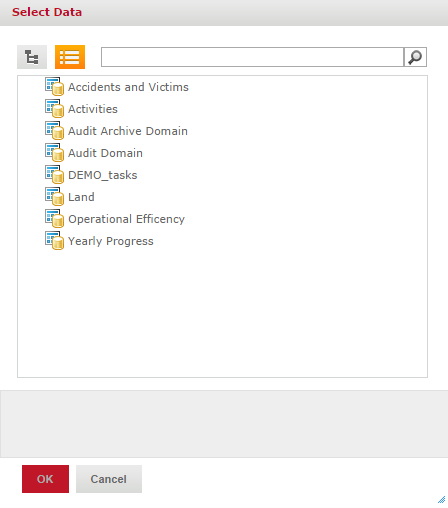
- In the next step, from all the attributes available from the chosen domain/topic, select all those that should be included in the ad hoc view. Attributes can either be double-clicked or dragged and dropped to the right-hand pane named Selected Fields. Of course, if required, all available attributes can be selected.
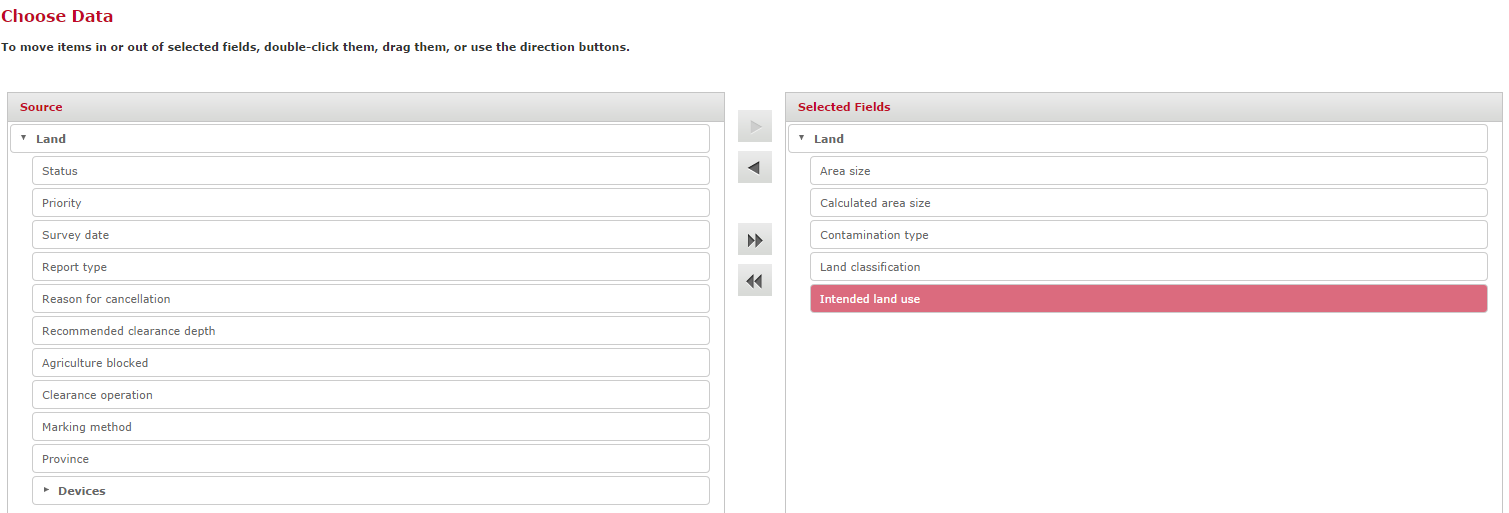
- Additional (optional) options can be specified at this stage:
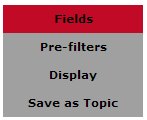
- Pre-Filters: the data for the ad hoc view can be filtered on any available attribute - for example, only accidents that happened in a specified date range could be considered
- Display: the order of appearance of the attributes can be changed, for example for ordering them logically
- Save as Topic: the specified selection of attributes, pre-filters and displays can be saved as another object type called Topic. A topic can also be the basis for an ad-hoc view.
- Finally, click OK to validate the selection and proceed to the Ad Hoc Editor.


Tree view:


The Ad Hoc Editor

Fields and Measures
The main ad hoc pane
Tables
Charts
Crosstabs
Filters
Save an Ad Hoc View and create a Report
Export data

{{#switch:|subgroup|child=|none=|#default=
}}{{#if:Business Intelligence|{{#if:|<th scope="col" style="border-left:2px solid #fdfdfd;width:100%;|}}{{#if:|{{#if:Business Intelligence|}}}}{{#if:Install Staging Area Generator · Using Staging Area Generator · Post Processing SQL Scripts · SAG Spatial reference system · Name Rules Staging Area · Scheduling the Staging Area creation|{{#if:Business Intelligence|}}{{#if:|}}{{#if:Staging Area Generator|<td style="text-align:left;border-left-width:2px;border-left-style:solid;|{{#if:|}}}}{{#if: IMSMA Staging Area Database · Connecting to IMSMA Staging area from ArcGIS · Connecting to IMSMA Staging area from Excel · Sharing an IMSMA Staging Area|{{#if:Business IntelligenceInstall Staging Area Generator · Using Staging Area Generator · Post Processing SQL Scripts · SAG Spatial reference system · Name Rules Staging Area · Scheduling the Staging Area creation|}}{{#if:IMSMA Staging Area|<td style="text-align:left;border-left-width:2px;border-left-style:solid;|}}{{#if:|{{#if:Business IntelligenceInstall Staging Area Generator · Using Staging Area Generator · Post Processing SQL Scripts · SAG Spatial reference system · Name Rules Staging Area · Scheduling the Staging Area creation IMSMA Staging Area Database · Connecting to IMSMA Staging area from ArcGIS · Connecting to IMSMA Staging area from Excel · Sharing an IMSMA Staging Area|}}{{#if:|<td style="text-align:left;border-left-width:2px;border-left-style:solid;|}}{{#if:Other Reporting Tools|{{#if:Other Reporting Tools|<td style="text-align:left;border-left-width:2px;border-left-style:solid;|}}{{#if: Introduction to indicators|{{#if:Indicators|<td style="text-align:left;border-left-width:2px;border-left-style:solid;|}}{{#if:|{{#if:|<td style="text-align:left;border-left-width:2px;border-left-style:solid;|}}{{#if:|{{#if:|<td style="text-align:left;border-left-width:2px;border-left-style:solid;|}}{{#if:|{{#if:|<td style="text-align:left;border-left-width:2px;border-left-style:solid;|}}{{#if:|{{#if:|<td style="text-align:left;border-left-width:2px;border-left-style:solid;|}}{{#if:|{{#if:|<td style="text-align:left;border-left-width:2px;border-left-style:solid;|}}{{#if:|{{#if:|<td style="text-align:left;border-left-width:2px;border-left-style:solid;|}}{{#if:|{{#if:|<td style="text-align:left;border-left-width:2px;border-left-style:solid;|}}{{#if:|{{#if:|<td style="text-align:left;border-left-width:2px;border-left-style:solid;|}}{{#if:|{{#if:|<td style="text-align:left;border-left-width:2px;border-left-style:solid;|}}{{#if:|{{#if:|<td style="text-align:left;border-left-width:2px;border-left-style:solid;|}}{{#if:|{{#if:|<td style="text-align:left;border-left-width:2px;border-left-style:solid;|}}{{#if:|{{#if:|<td style="text-align:left;border-left-width:2px;border-left-style:solid;|}}{{#if:|{{#if:|<td style="text-align:left;border-left-width:2px;border-left-style:solid;|}}{{#if:|{{#if:|<td style="text-align:left;border-left-width:2px;border-left-style:solid;|}}{{#if:|{{#if:|<td style="text-align:left;border-left-width:2px;border-left-style:solid;|}}{{#if:|{{#if:Business IntelligenceInstall Staging Area Generator · Using Staging Area Generator · Post Processing SQL Scripts · SAG Spatial reference system · Name Rules Staging Area · Scheduling the Staging Area creation IMSMA Staging Area Database · Connecting to IMSMA Staging area from ArcGIS · Connecting to IMSMA Staging area from Excel · Sharing an IMSMA Staging Area|}}}}
|none=|#default= | ||||||||||||||||||||||||||||||||||||||||||||||||||||||||||||||||||||||||||||||||||||||||
}}{{#ifeq:|Template|{{#ifeq:|child||{{#ifeq:|subgroup||{{#switch:creating ad hoc views in mint
|doc
|sandbox
|testcases =
|#default = {{#switch:hlist
 |plainlist
 |hlist
 |hlist hnum
 |hlist vcard
 |vcard hlist =
 |#default =
 }}
}}
}}}}}}