Difference between revisions of "View or Change Data Entry Form from Workbench"
From IMSMA Wiki
| Line 1: | Line 1: | ||
{{Note | Contact your {{IMSMANG}} Administrator if you have questions on permissions. }} | {{Note | Contact your {{IMSMANG}} Administrator if you have questions on permissions. }} | ||
| − | To view or | + | To view or edit a Data Entry Form from the Workbench: |
<ol> | <ol> | ||
<li>Select a Data Entry Form and click the [[Image:FieldViewIcon.png]] button. | <li>Select a Data Entry Form and click the [[Image:FieldViewIcon.png]] button. | ||
| Line 6: | Line 6: | ||
<div align="center"> '' Workbench window''</div></li> | <div align="center"> '' Workbench window''</div></li> | ||
<li>Enter the data into the Data Entry Form. For more information on how to do data entry, see [[Use the Data Entry Form Editor Window]]. </li> | <li>Enter the data into the Data Entry Form. For more information on how to do data entry, see [[Use the Data Entry Form Editor Window]]. </li> | ||
| + | <li>Verify that the Date of Information is correct. It should reflect the age of the information.</li> | ||
<li>Save, Submit or Approve the Data Entry Form.</li></ol> | <li>Save, Submit or Approve the Data Entry Form.</li></ol> | ||
Revision as of 18:31, 3 July 2015
| |
Contact your IMSMANG Administrator if you have questions on permissions. |
To view or edit a Data Entry Form from the Workbench:
- Select a Data Entry Form and click the
 button.
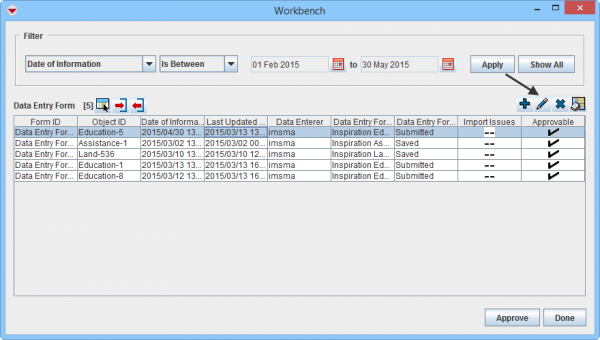 Workbench window
 - Enter the data into the Data Entry Form. For more information on how to do data entry, see Use the Data Entry Form Editor Window.
- Verify that the Date of Information is correct. It should reflect the age of the information.
- Save, Submit or Approve the Data Entry Form.

| |||||||||||||||||||||