Difference between revisions of "Access and Use the Workbench Window"
From IMSMA Wiki
| Line 37: | Line 37: | ||
</table> | </table> | ||
| − | |||
{| style="border-top:2px solid lightgray; border-bottom:2px solid lightgray; margin:10px;" | {| style="border-top:2px solid lightgray; border-bottom:2px solid lightgray; margin:10px;" | ||
|align="left" style="padding: 5px 10px 5px 10px"| All users will have access to the Workbench window. | |align="left" style="padding: 5px 10px 5px 10px"| All users will have access to the Workbench window. | ||
|} | |} | ||
| − | |||
<p>The IMSMA Workbench window lists field reports that were added to IMSMA and need manager approval. There are two ways you can access the Workbench window from the IMSMA Navigation window.</p> | <p>The IMSMA Workbench window lists field reports that were added to IMSMA and need manager approval. There are two ways you can access the Workbench window from the IMSMA Navigation window.</p> | ||
Revision as of 21:47, 26 June 2012
| Related Topics |
|---|
| Using IMSMA |
| Field Reports |
| Reconciling Items |
|
Combining Item Record |
| All users will have access to the Workbench window. |
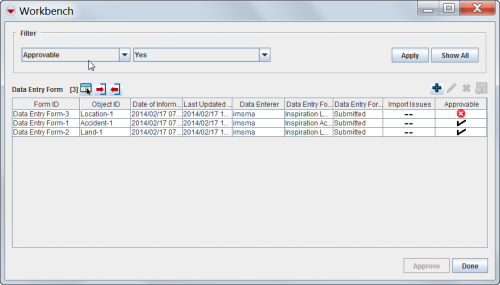
The IMSMA Workbench window lists field reports that were added to IMSMA and need manager approval. There are two ways you can access the Workbench window from the IMSMA Navigation window.
To access the Workbench window from a button:
- Click the
 button next to the GIS map controls toolbar.
- The Workbench window displays (Figure 62).
To access the Workbench window from the menu toolbar:
- From the Data Entry menu, select Field Reports.
- From the Field Reports menu, select View Workbench.
- The Workbench window displays (Figure 62).
Figure 62. Workbench Window
