Difference between revisions of "Add a Data Entry Form from the Summary Window"
From IMSMA Wiki
| Line 1: | Line 1: | ||
| − | {{Warning | This | + | {{Warning | This Action should '''not''' be used for a '''new''' Location. The recommended method is to start from: |
* the [[Image:MapToolbarAddDataEntryForm.png|Add Data Entry Forms]] in the Main Navigation window '''OR''' | * the [[Image:MapToolbarAddDataEntryForm.png|Add Data Entry Forms]] in the Main Navigation window '''OR''' | ||
* the ''Data Entry''' menu, select ''Data Entry Forms''. | * the ''Data Entry''' menu, select ''Data Entry Forms''. | ||
Revision as of 23:49, 11 March 2015
| |
This Action should not be used for a new Location. The recommended method is to start from:
|
Summary window toolbar
- Click the
 button.
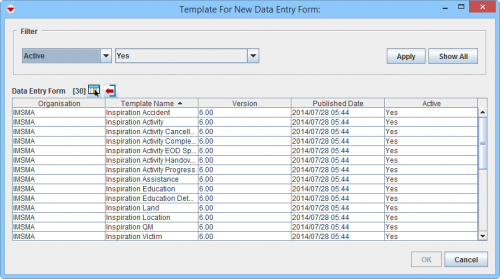
Select Template for New Data Entry Form window
- The Template for New Data Entry Form window displays.
- Select the Data Entry Form template that you would like to use
- Click OK.
- The Data Entry Form Editor displays a new Data Entry Form. The following information are automatically populated:
- Form ID
- Item ID
- Date of information
- Reconciliation tab.
Reconciliation Tab Add Method from Location Summary window
Adding a Data Entry Form from a Location Summary window automatically assigns the Location to the Data Entry Form.
Reconciliation Tab Add Method from other Summary window
Adding a Data Entry Form from the other Summary windows automatically assigns the Location to the new Data Entry Form and Links the new Data Entry Form to current the Summary item.
- If appropriate, Link to other items too.
- Enter the data into the Data Entry Form. For more information on how to do data entry, see Use the Data Entry Form Editor Window.
- Save, Submit or Approve the Data Entry Form.
| |
After the Data Entry Form is Approved it may take a few seconds for the Summary window to refresh. If it does not then reopen the Summary window. |
| |
This Action was introduced in version 6.0. |
| |||||||||||||||||||||


