Summary window toolbar
- Open the Location window of the item that requires location reassignment by clicking on the
 in the Summary window toolbar.
 - Select the item in the Location window, and then click the
 button.
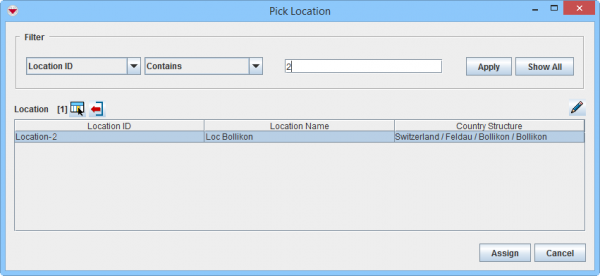
 - The Pick Location window displays.
- Filter the item list to display the desired location. Click here for help on how to filter lists.
- Select a Location from the list, and then click Assign.
- The Template For <Item> : <Item> window displays.
- Select the Data Entry Form template used for the item you opened in step 1.
- Click OK.
- The Data Entry Form Editor displays a new Data Entry Form. The date of information field, the item ID field, and the Reconciliation tab are automatically populated with the location reassignment information.
- Verify that the location reassignment information displays on the Reconciliation and Comments tabs.
- Approve, submit, or save the Data Entry Form.
- The location is reassigned when the Data Entry Form is approved.
Location Summary window
Pick Location window
| |
Data entered in the Data Entry Form can overwrite existing item data. |
| |
You can restore the previous location by unapproving the location reassignment Data Entry Form. |
| |||||||||||||||||||||

