Configuration IMSMA Remote Entry
From IMSMA Wiki
| |
It may look like that it is possible to import more than one file at the same time but only one file will be imported even if more than one are selected. |
Importing Templates
| |
Always import templates published in IMSMANG. |
- Click Templates on the System Configuration tab.
- Click Import.
- Click Choose Files.
- Select template in and then click Open.
- Click Import.
Import templates
The Data Entry Form template displays in the list.
Deleting Templates
- Click Templates on the System Configuration tab.
- Select the templates, and then click Delete.
- Click Delete on the confirmation window.
The Data Entry Form templates no longer display in the list.
Importing Auxiliary Data
| |
Always import data exported from IMSMANG. See Export Auxiliary Data for more information. |
- Click Auxiliary Data on the System Configuration tab.
- Locate the auxiliary data type, and then click Import.
- Click Choose Files.
- Select a file and then click Open.
- Click Import.
- Repeat until all Auxiliary data is imported
Import Auxiliary data
In the table, the total for the imported data type increases by the number of new records.
Deleting Auxiliary Data
| |
When you delete auxiliary data used in a Data Entry Form, the data will not display in the Data Entry Form. |
- Click Auxiliary Data on the System Configuration tab.
- Locate the auxiliary data type, and then click Delete.
The total for the deleted auxiliary data type becomes 0.
Configuring Other Settings
- Click Other on the System Configuration tab.
- Configure the default settings as shown in the following table.
- Click Apply when finished.
| How To | Steps to Complete |
| Change the number of items that display per page | Select an option from the Number of records per page list |
| Import a new coordinate reference system using a .prj file | See section below |
| Set the default coordinate reference system | Select an option from the Coordinate Reference System list |
| Set the default coordinate reference format | Select an option from the Coordinate Format list |
| Set the location where Data Entry Forms are saved and imported to | Enter a location in the Data Entry Form Directory text box |
| Set the location where Data Entry Form templates are imported to | Enter a location in the Template Directory text box |
| Set the location where Data Entry Forms are exported to | Enter a location in the Data Entry Form Export Directory text box |
Importing Coordinate Reference Systems
- Click Other on the System Configuration tab.
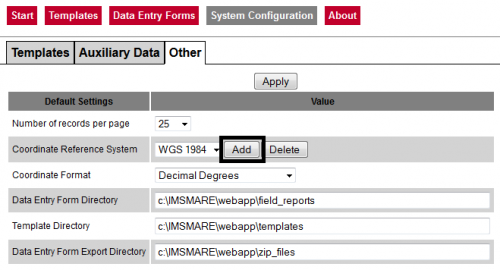
- Click Add in the Coordinate Reference System row.
- Click Choose Files for selecting a .prj file to import.
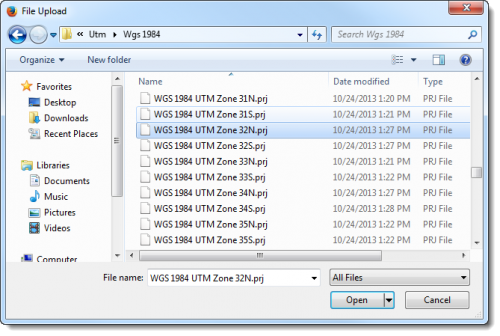
- Locate and select a .prj file, then click Open.
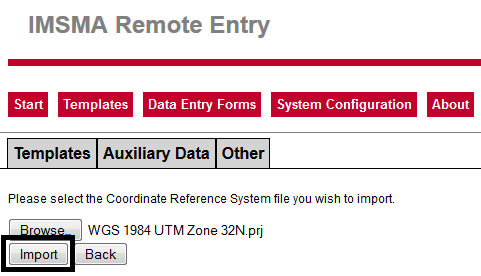
- Click Import to import the coordinate reference system.
Click Add
Click Choose Files
| |
In a standard installation of IMSMANG, coordinate reference system files are located in C:\IMSMAng\server\gis\coordinate systems. |
Browse for a .prj file
The coordinate reference system is imported to RE, and is now available for Data Entry Form data entry.
Import the .prj file
Deleting Coordinate Reference Systems
- Click Other on the System Configuration tab.
- Select a coordinate reference system from the dropdown menu.
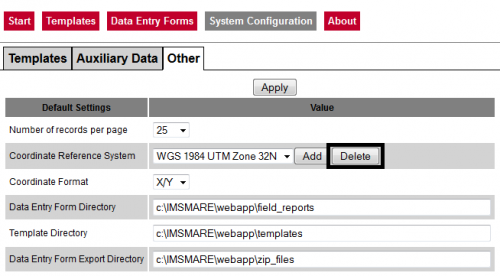
- Click Delete.
The Other tab displays.
The Coordinate Reference System import page displays.
The Coordinate Reference System is deleted.
Delete the Coordinate Reference System


