 |
Custom defined fields must have a unique combination of item, name, and data type.
|
To add a custom defined field:
- From the Customisation menu, select Data Inventory Manager.
- The Data Inventory Manager window displays.
- From the left pane of the Data Inventory Manager window, select the item and the data category to which you would like to add a CDF.
- From the right pane of the Data Inventory Manager window, click the
 button.
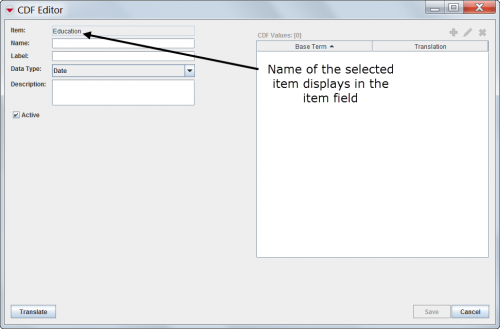
- The CDF Editor window displays.
- Enter a name in the Name field. The name should be no longer than 60 characters and should not contain periods (.), underscores (_), or capital letters. In addition it cannot start with a digit.
- Enter a label in the Label field. The label is the default custom defined field’s name that the user will see in the Data Entry Form Manager window.
- Select the data type for the custom defined field from the Data Type list.
| Data Types for Custom Defined Fields
|
| Data Type
|
Description and Comments
|
| Text Field
|
unlimited characters
|
| Date
|
Month, day, year
|
| Number
|
≤15 decimal points
|
| Organisation
|
Allows the user to select organisational data
|
| Place
|
Allows the user to select place data
|
| Country Structure
|
Allows the user to select country structure level data
|
| Multiple Select
|
Allows the user to select zero or more values provided in the CDF Values field
|
| Single Select
|
Allows the user to select one value from provided values in the CDF Values field
|
- Enter a description for the custom defined field in the Description field.
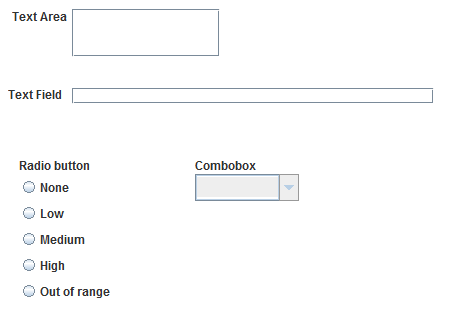
- For Text and Single Select CDFs, there are two different display formats to choose between.
 |
In version 6.0 two different display formats for Text fields has been introduced.
|
- If you selected the Multiple Select or Single Select option, click the
 button.
- The Add window displays.
- Enter the value for the list in the Value field.
 |
When entering values for lists, be sure to:
- Enter values in the order that you would like them to display to the user
- Enter values in the language in which the users will use IMSMA
|
- Do one of the following:
- If you would like to save the value and enter additional values, click the Save button.
- If you have completed entering the values for the list, click the Done button.
- If you selected the Single Select option, chose an option from the Selection Display field to display the CDF as either a list of radio buttons or as a combo box.
- Do one of the following:
- To save the custom defined field and close the CDF Editor window, click the Save button.
- If the custom defined field information is successfully saved, the CDF Editor window closes and the custom defined field is listed in the Data Inventory Manager window.
 |
If you would like to add the custom defined field to existing data entry form templates, you will need to update and republish the data entry form template.
|
- To discard the custom defined field and close the CDF Editor window, click the Cancel button.
 button.
 button.
