Reconcile as New
From IMSMA Wiki
| |
This page ONLY applies when the Data Entry Form has been created via the Data Entry menu or the Add Data Entry Forms button in the Main Navigation toolbar. |
- From the Reconciliation tab of the Data Entry Form Editor window, select the row associated with the item you would like to assign to a Location.
- Click the
 .
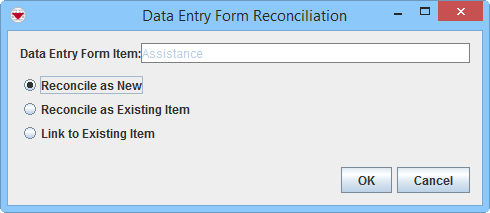
. - When the Data Entry Form Reconciliation window displays, select the Reconcile as New option. Click the OK button.
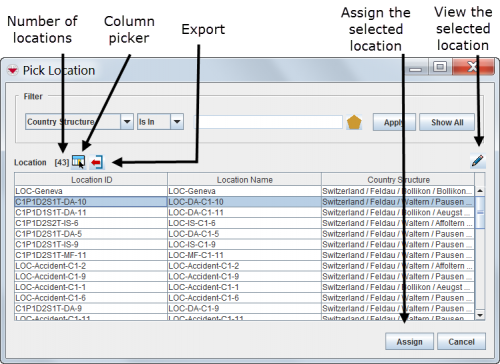
- The Pick Location window displays.
Pick Location Window
- Filter the item list to display the desired location. Click here for help on how to filter lists.
- Select the row for the location that you would like to assign to the item to.
- Click the Assign button.
- The location name displays in the Data Entry Form Editor window under Action/Object under the Reconciliation tab.
- If appropriate, Link to other items.
- Save, Submit or Approve the Data Entry Form.
Reconciliation Tab
Reconciliation Options
Reconciliation Tab
| |
When reconciling an Education item, a new item will always be created. An Education item cannot be combined with existing Education items. |
For more information on how to do data entry, see Use the Data Entry Form Editor Window.
| |||||||||||||||||||||


