Difference between revisions of "Add Assistance Classification"
From IMSMA Wiki
| Line 3: | Line 3: | ||
<li>From the '''Data Entry''' menu, select '''Assistance Classification'''.</li> | <li>From the '''Data Entry''' menu, select '''Assistance Classification'''.</li> | ||
The Assistance Classification Manager window displays. | The Assistance Classification Manager window displays. | ||
| + | <li>Select the node of the parent to the Assistance classification that you would like to add.</li> | ||
<li>Click the [[File:FieldTemplateIcon.png|20px]] button.</li> | <li>Click the [[File:FieldTemplateIcon.png|20px]] button.</li> | ||
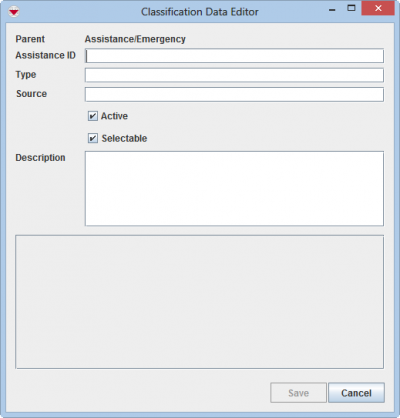
The Classification Data Editor window displays. | The Classification Data Editor window displays. | ||
Revision as of 23:30, 20 June 2014
To add Assistance classification to IMSMANG:
- From the Data Entry menu, select Assistance Classification.
- Select the node of the parent to the Assistance classification that you would like to add.
- Click the
 button.
 - Enter the Assistance ID.
- Enter the name of the Assistance classification.
- Enter the source of the Assistance classification in the Source field e.g. WHO.
- Enter a description of the classification.
- If there are any fields in the Custom Defined Fields section, enter data in those fields.
- Do one of the following:
- To add the ordnance, click the Save button.
- If you do not want to save the new place, click the Cancel button.
The Assistance Classification Manager window displays.
The Classification Data Editor window displays.
| |||||||||||||||||||||||
