Difference between revisions of "Lasso an Area on the Map"
| Line 50: | Line 50: | ||
<li>To disable the lasso map control, select another GIS map control.</li> | <li>To disable the lasso map control, select another GIS map control.</li> | ||
</ol> | </ol> | ||
| + | |||
| + | [[Category:Using IMSMA]] | ||
| + | [[Category:IMSMA Navigation Window]] | ||
| + | [[Category:Map Pane]] | ||
| + | [[Category:How To]] | ||
Revision as of 19:42, 20 June 2012
| Related Topics |
|---|
| Daily Activities |
|
IMSMA Navigation |
| How To Information |
|
Reposition Map Image |
The lasso map control allows you to specify the area on the map for which you would like to view data in the items pane. When you select a map area with the lasso map control, the item tabs display only those records that are within the selected area.
| Represents a tip or note for using IMSMA Mobile. | Before using the lasso tool, you will want to have at least one map theme enabled. Also, it may be helpful to zoom into the area of the map where the icons are located. |
To use the lasso map control:
- Click the
 button.
 - Click the map.
- While holding down the mouse button, drag the mouse over the area that you would like to include.
- A rectangle displays over the selected area.
- After you have selected the area for which you would like to view records, release the mouse button.
- To disable the lasso map control, select another GIS map control.
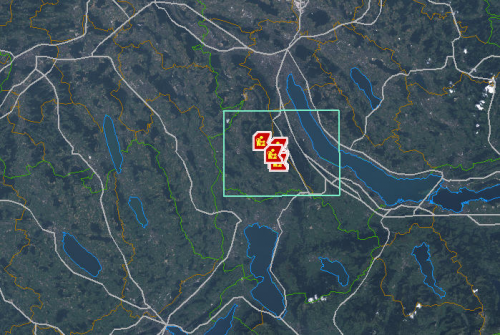
A green rectangle displays around the selected area (Figure 17). The items pane displays data for only those records that are within the selected area. If the selected area includes item records in a location, but the location is not in the selected area, the location data is still displayed in the items pane.
Figure 17. Map with Lasso
