Difference between revisions of "Exporting"
From IMSMA Wiki
| Line 22: | Line 22: | ||
<ol> | <ol> | ||
<li>Select the row(s) that you would like to export to a file.</li> | <li>Select the row(s) that you would like to export to a file.</li> | ||
| − | <li>Click the [[Image: | + | <li>Click the [[Image:FieldReportExportIcon.png]] button.</li> |
:The Export Options window displays. | :The Export Options window displays. | ||
</ol> | </ol> | ||
Revision as of 11:54, 31 January 2014
Several windows in IMSMA allow you to export selected rows from the window to either XML or to a comma-separated values (CSV) file.
Export to File Icon
The following windows allow you to export selected row(s) to a file by clicking the button:
- Ordnance List
- Ordnance Selection
- Data Entry Form Templates
- Organisation List
- Organisation Selection
- Place List
- Place Selection
- Reports
- Report Templates
- Saved Searches
- Workbench
To export data from the selected row(s) to a file:
- Select the row(s) that you would like to export to a file.
- Click the
 button.
 - The Export Options window displays.
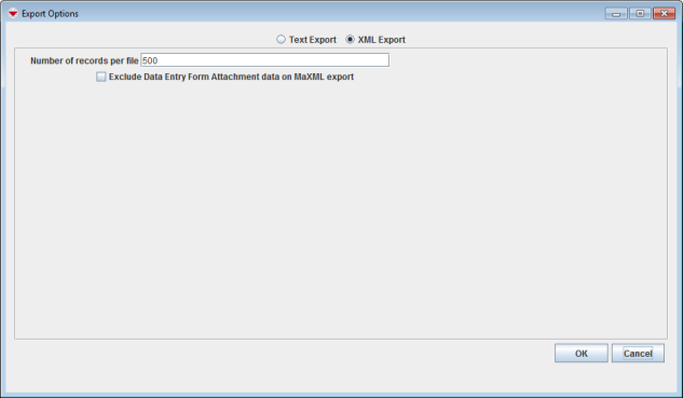
Export Options Window
- Select one of the following options:
- XML Export – exports the file in XML format.
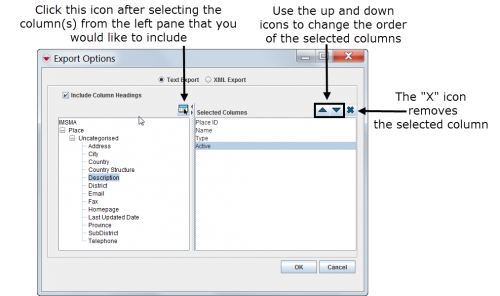
- Text Export – exports the file in CSV format. If you select the Text Export option, you can select the columns that you would like to include in the export file.
Export Options Window – Text Export
- Click the OK button.
| ||||||||||

