Difference between revisions of "Reconcile CDFs When Publishing a Data Entry Form"
From IMSMA Wiki
| Line 1: | Line 1: | ||
If you attempt to publish a Data Entry Form template from another IMSMA installation, you may be required to reconcile the CDFs in the Data Entry Form template to CDFs that are defined in IMSMA. Reconciliation is necessary to ensure that the data is associated with the correct CDF. | If you attempt to publish a Data Entry Form template from another IMSMA installation, you may be required to reconcile the CDFs in the Data Entry Form template to CDFs that are defined in IMSMA. Reconciliation is necessary to ensure that the data is associated with the correct CDF. | ||
| − | If you attempt to publish a Data Entry Form template that contains CDFs which have been defined outside of your IMSMA installation, the Reconcile CDFs window displays with a message stating, | + | If you attempt to publish a Data Entry Form template that contains CDFs which have been defined outside of your IMSMA installation, the Reconcile CDFs window displays with a message stating, ''This form contains CDFs which are not in your database. Please reconcile the following CDFs before publishing:'' |
| − | [[File:Reconcile CDFs.png|440px]] | + | [[File:Reconcile CDFs.png|center|440px]] |
To reconcile a CDF: | To reconcile a CDF: | ||
<ol> | <ol> | ||
| − | <li>From the Reconcile CDFs window, select the row associated with the CDF. | + | <li>From the Reconcile CDFs window, select the row associated with the CDF.</li> |
| − | + | <li>To resolve the CDF in the Data Entry Form template to an already existing CDF | |
| − | <li> | + | <ol type="a"> |
| − | + | <li>Click the [[File:FieldViewIcon.png|20px]] button. | |
| − | [[Image:Reconcile CDFs.png|500px]] | + | <li>Select the CDF you would like to use in the list. |
| − | + | <li>Click the '''OK''' button. | |
| − | + | </ol> | |
| + | <li>To add a new CDF, click the [[File:FieldTemplateIcon.png|20px]] button. | ||
| + | [[Image:Reconcile CDFs.png|center|500px]] | ||
| + | <ol type="a"> | ||
| + | <li>Enter the name of the CDF. | ||
{{New_6.0 | The rules for CDF name has changed to: The name should be no longer than 60 characters and should not contain periods (.), underscores (_), or capital letters. In addition it cannot start with a digit.}} | {{New_6.0 | The rules for CDF name has changed to: The name should be no longer than 60 characters and should not contain periods (.), underscores (_), or capital letters. In addition it cannot start with a digit.}} | ||
| − | + | <li>Click the '''Save''' button to add the CDF and to reconcile it with the CDF in the Data Entry Form template. | |
| − | |||
</ol> | </ol> | ||
{{note| When reconciling CDFs of the data type single-selection or multiple-selection, the CDF to which you are resolving to must contain the values specified in the Data Entry Form template CDF. If any values are missing the addition of the values should be done in the Data Inventory Manager since the CDF already exists.}} | {{note| When reconciling CDFs of the data type single-selection or multiple-selection, the CDF to which you are resolving to must contain the values specified in the Data Entry Form template CDF. If any values are missing the addition of the values should be done in the Data Inventory Manager since the CDF already exists.}} | ||
| − | + | ||
| − | <li>Repeat steps | + | <li>Repeat steps above for each CDF.</li> |
| − | + | <li>After you have reconciled all CDFs in the Data Entry Form template, the '''OK''' button in the lower, right corner of the Reconcile CDF window becomes active. | |
<li>Click the '''OK''' button.</li> | <li>Click the '''OK''' button.</li> | ||
| − | + | <li>The Data Entry Form is published. | |
</ol> | </ol> | ||
Latest revision as of 16:14, 19 June 2017
If you attempt to publish a Data Entry Form template from another IMSMA installation, you may be required to reconcile the CDFs in the Data Entry Form template to CDFs that are defined in IMSMA. Reconciliation is necessary to ensure that the data is associated with the correct CDF.
If you attempt to publish a Data Entry Form template that contains CDFs which have been defined outside of your IMSMA installation, the Reconcile CDFs window displays with a message stating, This form contains CDFs which are not in your database. Please reconcile the following CDFs before publishing:
To reconcile a CDF:
- From the Reconcile CDFs window, select the row associated with the CDF.
- To resolve the CDF in the Data Entry Form template to an already existing CDF
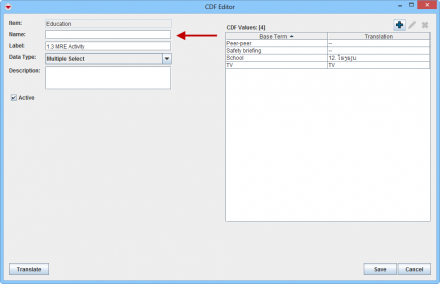
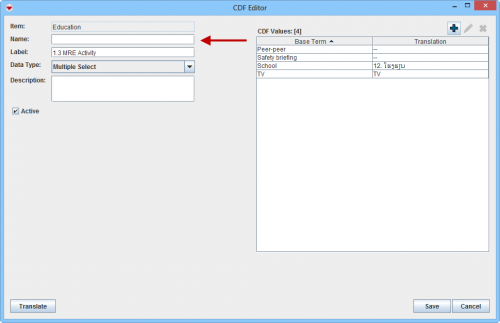
- To add a new CDF, click the
 button.
- Enter the name of the CDF.
- Click the Save button to add the CDF and to reconcile it with the CDF in the Data Entry Form template.
- Repeat steps above for each CDF.
- After you have reconciled all CDFs in the Data Entry Form template, the OK button in the lower, right corner of the Reconcile CDF window becomes active.
- Click the OK button.
- The Data Entry Form is published.
| |||||||||||||||||||||||||

