Difference between revisions of "Apply a Template to the Map Page Layout"
From IMSMA Wiki
| Line 4: | Line 4: | ||
<li>Click the [[Image:AppMapLayIcon.png]] button on the Map Layout toolbar.</li> | <li>Click the [[Image:AppMapLayIcon.png]] button on the Map Layout toolbar.</li> | ||
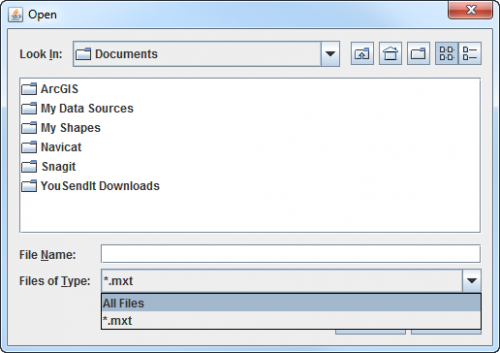
:The Open window displays. | :The Open window displays. | ||
| + | [[Image:Map template open.png|500px|center]] | ||
<li>From the Open window:</li> | <li>From the Open window:</li> | ||
<ol type="a"> | <ol type="a"> | ||
| − | <li>Navigate to the location of the . | + | <li>Change file type to ''All files''. |
| − | <li>Select the . | + | <li>Navigate to the location of the .mxd that contains the Layout that you would like to apply to the map.</li> |
| + | <li>Select the .mxd file.</li> | ||
<li>Click the '''Open''' button.</li> | <li>Click the '''Open''' button.</li> | ||
| − | :The selected | + | :The selected layout is applied to the map. |
</ol> | </ol> | ||
</ol> | </ol> | ||
Latest revision as of 16:48, 4 October 2016
Map layout templates include any shapes, images, text, page setup options, scale bar, north indicator, and legend that you have added to the map view. You can apply a saved template to the map that you have displayed.
To apply a template to the current map display:
- Click the
 button on the Map Layout toolbar.
 - The Open window displays.
- From the Open window:
- Change file type to All files.
- Navigate to the location of the .mxd that contains the Layout that you would like to apply to the map.
- Select the .mxd file.
- Click the Open button.
- The selected layout is applied to the map.
