Difference between revisions of "Staging Area Generator"
| Line 69: | Line 69: | ||
| align="left" | '''4 - Additional Options''' | | align="left" | '''4 - Additional Options''' | ||
| align="left" | This section is only enabled after a successful validation of the connection details. | | align="left" | This section is only enabled after a successful validation of the connection details. | ||
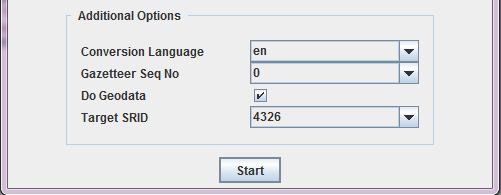
| − | * '''Conversion Language:''' | + | * '''Conversion Language:''' specifies the language in which the staging area database should be created. This refers to the translation concept in {{IMSMANG}}. For example, the English values for the status of a Land include ''Open'', ''Worked on'' and ''Closed''. However, in IMSMA translations of these terms into other languages can be defined. Considering this example, the option chosen in the Conversion Language field specifies which value will be written into the status_enum field of the HAZARD table in the staging area. If a translation does not exist in the specified language, it will default to English or, if this is not available, to the IMSMA base term. When translations are heavily used, it would be possible for instance to create one staging area in language 1 and another one in language 2, with the same data but values in different languages. |
| − | * '''Gazetteer Seq No:''' | + | * '''Gazetteer Seq No:''' this option allows to specify the flattening of the country structure into the main object tables, if gazetteer alternative names are used in {{IMSMANG}}. Alternative names in the country structure, if defined, have a sequence number. For example, if for each country structure element two alternative names are defined, the first one has sequence number 0 , the second one sequence number 1. If the standard gazetteer names should be used in the staging area, choose '''None'''. Otherwise, choose the appropriate sequence number. |
* '''Do Geodata:''' this is a switch to enable/disable the generation of geodata. The staging area can either be created with non-geodata only, or including all the coordinates (points, polylines and polygons), i.e. the data stored in the GEOPOINT, GEOSPATIALINFO and related tables in {{IMSMANG}}. Refer to the section on geodata below for more details. | * '''Do Geodata:''' this is a switch to enable/disable the generation of geodata. The staging area can either be created with non-geodata only, or including all the coordinates (points, polylines and polygons), i.e. the data stored in the GEOPOINT, GEOSPATIALINFO and related tables in {{IMSMANG}}. Refer to the section on geodata below for more details. | ||
* '''Target SRID:''' when generating geodata in the staging area, the data can be re-projected. The Target SRID allows to define the projection. The default, 4326, corresponds to '''WGS 84'''. For a complete list of available projections, issue the following query on an empty staging area (i.e. the one created after clicking on '''Validate Selections'''): | * '''Target SRID:''' when generating geodata in the staging area, the data can be re-projected. The Target SRID allows to define the projection. The default, 4326, corresponds to '''WGS 84'''. For a complete list of available projections, issue the following query on an empty staging area (i.e. the one created after clicking on '''Validate Selections'''): | ||
Revision as of 06:35, 20 June 2014
| This page is under construction |
The IMSMA Staging Area Generator is a tool that allows to create a staging area from an IMSMA database. It is thus part of the IMSMANG tool set, but not directly integrated into the IMSMANG installation package. It thus needs to be installed separately. Please contact your country focal point in order to get the latest installation package.
| |
The Staging Area Generator can only be used with IMSMANG 6.0 and above |
Installing the IMSMA Staging Area Generator
- To install the staging area generator (SAG) double-click on the etl.exe file..
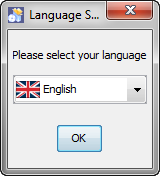
- The graphical installer then starts. On the first screen, choose the language you would like to use for the installation and click OK.
- Navigate the Installation panels of the graphical installer as described below:
- On the Welcome screen, click Next.
- On the Infromation screen, click Next.
- We strongly recommend to use the default installation path for the Staging Area Generator. Click Next.
- If the target folder (C:\IMSMAETLTool) does not already exist a message will be shown, click OK.
- In the packages selection panel, click Next.
- Wait for the installation progress bar to finish, then click Next.
- When the Setup Shortcuts panel displays, click Next.
- When the installation has completed successfully, click Done.
After the installation, the following menu entry will be visible in Start → All Programs → IMSMA:
![]()
Using the IMSMA Staging Area Generator
Basic Principles
Where to use it
The Staging Area Generator Graphical User Interface
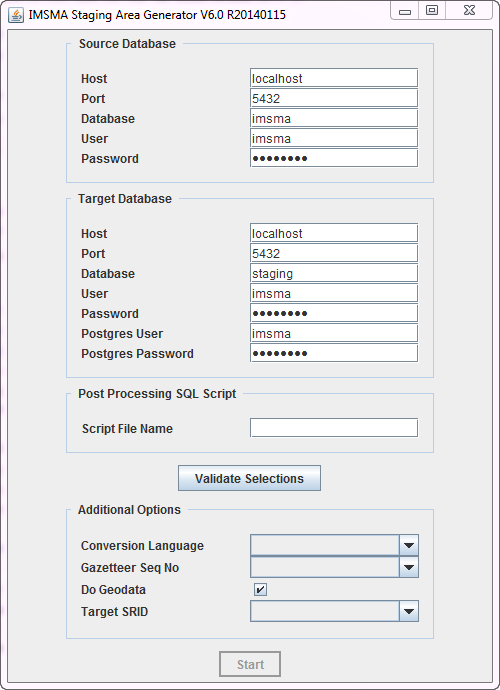
To start the Staging Area Generator, click on the Staging Area Generator Icon in Start → All Programs → IMSMA. This will open the following graphical user interface.
| Sections in the Staging Area Generator user interface | |
| Section | Description |
| 1 - Source Database | This section defines the connection of the source database, i.e. the IMSMANG database from which a staging area should be generated. If the source and the target databases should be on the same server, the default connection parameters can be kept. If the staging area is generated on another server, then the IP address of the source server hosting the IMSMANG database has to be provided in the Host field. Remember to update the password in the Password field if you have changed the default imsma password on your IMSMANG installation. |
| 2 - Target Database | This section defined the connection to the target database, i.e. the staging area database to be created. The parameters to be provided are the following:
|
| 3 - Post Processing SQL Scripts (optional) | In this optional field it is possible to provide the full path and name to a validated SQL file. Whatever is specified inside that file will be executed on the staging area database after its generation. This can be valuable in several use cases, for example:
Contact your country focal point for help in developing SQL statements according to specific requirements. |
| Validate Selections | After having provided all required connection details (sections 1 and 2), click on Validate Selections. The following actions will be performed:
In case of an error, the related message usually specifies what the exact issue is. |
| 4 - Additional Options | This section is only enabled after a successful validation of the connection details.
select * from spatial_ref_sys |
Scheduling the Staging Area creation
| ||||||||||||||


