Difference between revisions of "Patch Installation Guide"
From IMSMA Wiki
(Created page with "{{Note| Patch installation of {{IMSMANG}} v 6.0 is '''ONLY''' possible to use when {{IMSMANG}} v 6.0 is already installed and the database is '''ALREADY''' upgraded to v 6.0.}...") |
|||
| Line 1: | Line 1: | ||
{{Note| Patch installation of {{IMSMANG}} v 6.0 is '''ONLY''' possible to use when {{IMSMANG}} v 6.0 is already installed and the database is '''ALREADY''' upgraded to v 6.0.}} | {{Note| Patch installation of {{IMSMANG}} v 6.0 is '''ONLY''' possible to use when {{IMSMANG}} v 6.0 is already installed and the database is '''ALREADY''' upgraded to v 6.0.}} | ||
| − | 1 Stop client, server and | + | [[Image:PatchInstallationGuideStep1.png|center|500px|''Running the IMSMA Patch Installer'']] |
| − | + | ==Part 1. Preparations== | |
| − | + | ||
| − | + | <ol> | |
| − | + | <li>Take a backup of the {{IMSMANG}} database. | |
| − | + | <li>Stop the {{IMSMANG}} client, server and TrayLauncher. | |
| − | + | <li>Take copy of PostGreSQL configuration file C:\IMSMAng\pgsql\data\pg_hba.conf. | |
| + | |||
| + | ==Part 2. Run the {{IMSMANG}} Installer== | ||
| + | [[Image:Cmd NG.png|center|400px]] | ||
| + | |||
| + | <li>Double-click the '''Install_IMSMA.exe''' file in the patch installation package.</li> | ||
| + | <li>When the command window displays, follow the instructions. | ||
| + | |||
| + | [[Image:Graphic NG.png|center|200px]]</li> | ||
| + | |||
| + | [[Image:1st panel NG.png|center|400px]]</li> | ||
| + | |||
| + | <li>Navigate the Installation panels of the graphical installer as described below: | ||
| + | <ol> | ||
| + | <li>In the Welcome panel, click '''Next'''.</li> | ||
| + | <li>Select the ''I accept the terms of this license agreement'' option, and click '''Next'''.</li> | ||
| + | <li>We strongly recommend to use the default installation path for {{IMSMANG}}. Click '''Next'''.</li> | ||
| + | <li>If the target folder does not already exist a message will be shown, click '''OK'''.</li> | ||
| + | <li>In the packages selection panel, click '''Next'''.</li> | ||
| + | <li>Wait for the installation progress bar to finish, then click '''Next'''.</li> | ||
| + | <li>When the Setup Shortcuts panel displays, click '''Next'''.</li> | ||
| + | <li>When the installation has completed successfully, click '''Done'''. | ||
| + | |||
| + | {{note | When the graphical installer has finished the focus goes back to the command window and the next steps of the installation continue so please do not close the command window.}}</li></ol> | ||
| + | </li> | ||
| + | |||
| + | <li>When prompted by the command window, press any key on the keyboard to continue.</li> | ||
| + | </ol> | ||
| + | |||
| + | ==Part 3. Set Permissions for the Tray Launcher== | ||
| + | |||
| + | [[Image:PatchInstallationGuideStep2.png|center|500px|''Setting Tray Launcher Permissions'']] | ||
| + | <div align="center"> | ||
| + | </div> | ||
| + | |||
| + | <ol><li>On your desktop, right-click the IMSMA Tray Launcher icon and select the '''Properties''' option.</li> | ||
| + | <li>In the IMSMA Tray Launcher Properties window, select the '''Shortcut''' tab, then click '''Advanced'''. </li> | ||
| + | <li>In the Advanced Properties window, check the '''Run as administrator''' checkbox, then click '''OK'''. It is important to use ''Run as administrator'' the first time {{IMSMANG}} is started since other installation programs will be triggered. Depending on how much user permissions are limited, it might be better to not Run as administrator.</li> | ||
| + | <li>Back in the IMSMA Tray Launcher Properties window, click '''OK'''. It is important to set this property since you will start other applications with the Tray Launcher.</li></ol> | ||
| + | |||
| + | <li> Re- apply any changes to config file Note: there are changes to the config file so DO re-apply (as in do not just rename file | ||
| + | <li> Start TrayLauncher | ||
| + | <li> If there are any database changes the Update will start automatically | ||
Revision as of 22:22, 23 February 2015
| |
Patch installation of IMSMANG v 6.0 is ONLY possible to use when IMSMANG v 6.0 is already installed and the database is ALREADY upgraded to v 6.0. |

Part 1. Preparations
- Take a backup of the IMSMANG database.
- Stop the IMSMANG client, server and TrayLauncher.
- Take copy of PostGreSQL configuration file C:\IMSMAng\pgsql\data\pg_hba.conf.
Part 2. Run the IMSMANG Installer
- Double-click the Install_IMSMA.exe file in the patch installation package.
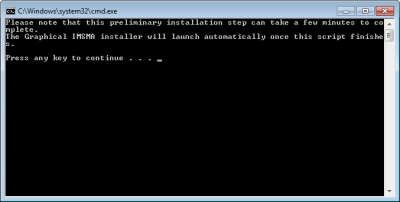
- When the command window displays, follow the instructions.
- Navigate the Installation panels of the graphical installer as described below:
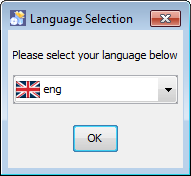
- In the Welcome panel, click Next.
- Select the I accept the terms of this license agreement option, and click Next.
- We strongly recommend to use the default installation path for IMSMANG. Click Next.
- If the target folder does not already exist a message will be shown, click OK.
- In the packages selection panel, click Next.
- Wait for the installation progress bar to finish, then click Next.
- When the Setup Shortcuts panel displays, click Next.
- When the installation has completed successfully, click Done.

When the graphical installer has finished the focus goes back to the command window and the next steps of the installation continue so please do not close the command window.
- When prompted by the command window, press any key on the keyboard to continue.


Part 3. Set Permissions for the Tray Launcher

- On your desktop, right-click the IMSMA Tray Launcher icon and select the Properties option.
- In the IMSMA Tray Launcher Properties window, select the Shortcut tab, then click Advanced.
- In the Advanced Properties window, check the Run as administrator checkbox, then click OK. It is important to use Run as administrator the first time IMSMANG is started since other installation programs will be triggered. Depending on how much user permissions are limited, it might be better to not Run as administrator.
- Back in the IMSMA Tray Launcher Properties window, click OK. It is important to set this property since you will start other applications with the Tray Launcher.