Difference between revisions of "GIS Preview from Workbench"
From IMSMA Wiki
(Created page with "<table cellspacing="5" cellpadding="0" style="float: right; clear: right; color: black; background: #f9f9f9; border: 1px solid #aaa; width: 22em; margin: 0 0 1.0em 1.0em; padd...") |
|||
| (12 intermediate revisions by 4 users not shown) | |||
| Line 1: | Line 1: | ||
| − | + | Data Entry Forms in the Workbench that contain geospatial data can be displayed on the map. | |
| − | |||
| − | |||
| − | |||
| − | |||
| − | |||
| − | |||
| − | |||
| − | |||
| − | |||
| − | |||
| − | |||
| − | |||
| − | |||
| − | |||
| − | |||
| − | |||
| − | |||
| − | |||
| − | |||
| − | |||
| − | |||
| − | |||
| − | |||
| − | |||
| − | |||
| − | |||
| − | |||
| − | |||
| − | |||
| − | |||
| − | |||
| − | |||
| − | |||
| − | |||
| − | |||
| − | |||
| − | + | To display Workbench Data Entry Form's geospatial data on the map: | |
| − | < | + | <ol> |
| + | <li>Select a Data Entry Form and click the [[Image:DispGeoData.png]] button. | ||
| + | [[Image:WB GIS Preview1.png|600px|center]] | ||
| + | <div align="center"> '' Workbench window''</div></li> | ||
| + | <li>The Map: Workbench Preview window displays. All themes are enabled by default. | ||
| + | [[Image:WB GIS Preview.png|500px|center]] | ||
| + | <div align="center"> '' Workbench Preview window''</div></li></ol> | ||
| − | + | {{New_6.0 | More functions have been added to the Preview window. It amongst other things possible to add labels. It is also possible to change the order of the themes.}} | |
| − | + | ||
| − | + | {{NavBox HowTo Reconcile and Approve}} | |
| − | [[Category: | + | |
| + | [[Category:NAA]] | ||
Latest revision as of 08:58, 18 March 2019
Data Entry Forms in the Workbench that contain geospatial data can be displayed on the map.
To display Workbench Data Entry Form's geospatial data on the map:
- Select a Data Entry Form and click the
 button.
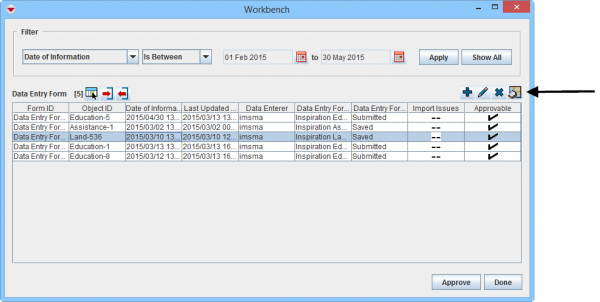 Workbench window
 - The Map: Workbench Preview window displays. All themes are enabled by default.
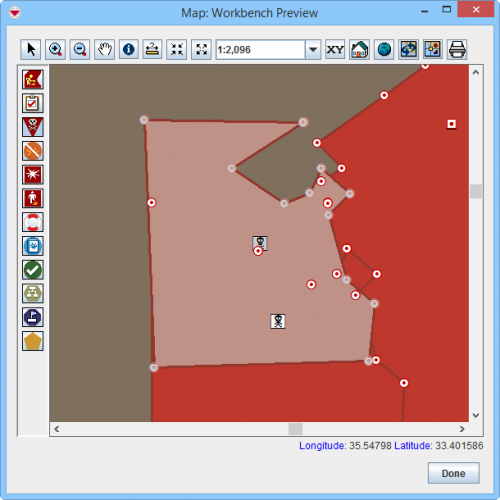 Workbench Preview window


| |
More functions have been added to the Preview window. It amongst other things possible to add labels. It is also possible to change the order of the themes. |
| |||||||||||||||||||||