Modify an iReport Template
| How To |
|---|
Overview
Fields, Variables, and Parameters
Adding a Field to an iReport Template
If you need to include a field that was not selected while using the Report Wizard, you will need to know the name of the field that is used by the data source. Find a list of available field names by using the Report Wizard.
To add a field to your report:
- From the View menu, select the Fields option.
- A window displays three tabs (Fields, Variables, and Parameters).
- From the Fields tab, click the New button.
- The Add/modify field window displays.
- In the Field Name field, enter the name of the field that you would like to include.
- Click the OK button.
- The field is included on the Fields tab.
- Close the window that displays the Fields, Variables, and Parameters tabs.
- Reposition the fields on your report as needed to accommodate the new field.
- Click the File:IRepF.png icon.
- Click the detail section of the report.
- While holding down the mouse button, drag the cursor to form the rectangle which will contain the new field.
- Release the mouse button.
- A placeholder for the field is displayed in the design section of the report.
- Double-click the placeholder that was added for the field.
- Change the placeholder text so that the field that you added is between the brackets.
Adding a Parameter to an iReport Template
Adding a parameter to an iReport Template.
- Right click -> Create Parameter
- Add a name, leave type as string
Adding a Variable to an iReport Template
Two ways to do it.
- Add a variable manually
- Drag to Summary Band
Adding a variable manually:
- Right click -> Add Variable
Report Query Filtering
Filtering results/Query Limitation
the SQL Field
Editing the SQL Field
Sorting and Grouping
Grouping
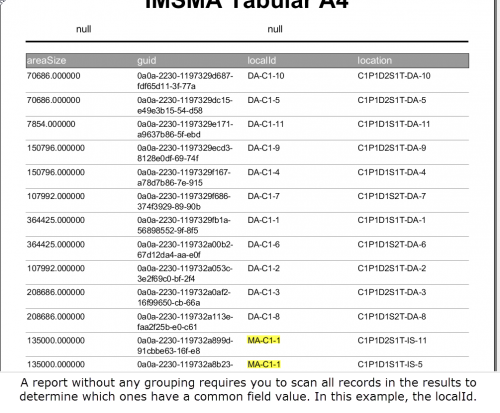
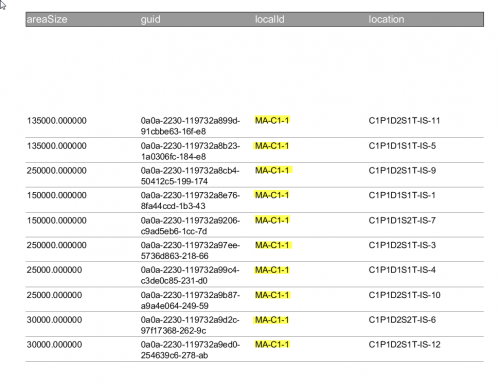
Grouping allows you to organise the report results using the values of a particular field. Grouping results makes it easier to identify the records which share a common value. Rather than having to visually scan the report results to determine which records have a common value, grouping automatically organises the results for you.
To illustrate, suppose you wanted to create a report to list all land within each location ID. The procedures that have been discussed so far in this training module would simply list all land along with their location ID. Although the location ID is included in the report, it would be difficult, tedious, and time-consuming to scan the entire report to identify those land that have a common location ID.
Figure 7. Land report with no grouping
Grouping report results automatically organises the records using the values on the specified field. Using the example above, the land in the report shown in Figure 8 are organised within the location to which they are associated. Records that do not contain a value for the selected grouping are put into their own group.
Land grouped by location
Adding a Group to an iReport Template
| |
The field on which you would like to group your report results must be included in the report. |
To add a group to an existing report:
- From the View menu, select Report Groups.
- A window displays the groups for the report.
- Click the New button.
- The Add/modify group window displays.
- Enter an identifier for the group. This should be a meaningful name that allows you to easily identify the contents of the group such as the field on which the results are grouped.
- Click the File:IRepExpress.png icon.
- The Expression editor window displays.
- Ensure that the Objects and expressions tab is selected.
- Click Fields.
- Double-click the name of the field on which you would like to add a grouping.
- The Expression editor window shows $F{FieldName} where FieldName is the name of the field that you selected previously.
- Click the Apply button.
- The Add/modify group window displays the expression in the Group Expression field.
- Click the OK button.
- The Add/modify group window closes.
| |
You may also enter the expression in the Group Expression field if you know the exact spelling of the field name on which you would like to group the results. The syntax is $F{FieldName}. |
Sorting Report Results
It may be helpful to sort the report results using the value in one or more of the fields. Sorting the results makes it easier to review the results and locate any records that you may be searching for. To sort report results:
- Create the report.
- From the Data menu, select the Report Query option.
- The Report query window displays.
- Click the Sort options button that is located at the bottom of the Report query window.
- The Sorting Options window displays.
- Click the Add Field button.
- The Sort Field window displays. The Sort by list displays all the fields that you have selected for the report.
- From the Sort by list, select the field by which you would like to sort the report results.
| |
When sorting data in reports that contain groups, ensure the “Group by” fields appear first in the sort order. |
- From the Sort Type list, select either the Ascending or Descending sort order.
- Click the OK button.
- The selected field displays in the Sorting Options window.
- Repeat steps 4-7 for each field on which you would like to sort the results.
- After you have completed adding the fields on which you would like to sort the results, click the Close button.
- The Sorting Options window closes.
- From the Report query window, click the OK button.
- The Report query window closes.
You will need to compile and execute the report for the sort options to take effect.
Contents
Working with Images=
Adding an Image to an iReport Template
????

